Puerto rican tembleque de coco: Tembleque – Puerto Rican Coconut Pudding
Tembleque – Puerto Rican Coconut Pudding
Jump to Recipe
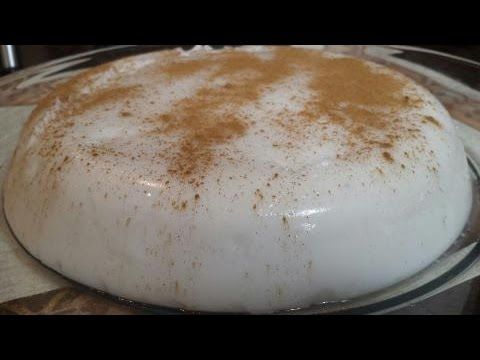
Tembleque de Coco – coconut pudding dusted with cinnamon. This traditional Puerto Rican dessert is easy to make with only 5 ingredients!
The name comes from the Spanish word “to tremble” like the delightful wiggle, jiggle and shake of this dessert.
Technically it’s a pudding since it’s made with cornstarch to thicken.
But it reminds me of cream custard since it’s so beautifully silky and sets so perfectly in whatever mold you use!
This is the standard tembleque recipe and it is perfect.
I consulted my favorite Puerto Rican cookbooks (Puerto Rican Cuisine in America and Cocina Criolla) to see if they had any tips to make it better.
The only difference they offer is using fresh coconut milk from scratch.
I bet that ramps up the flavor, but not everyone has access to fresh coconuts, or the time and tools needed to shred, soak, etc!
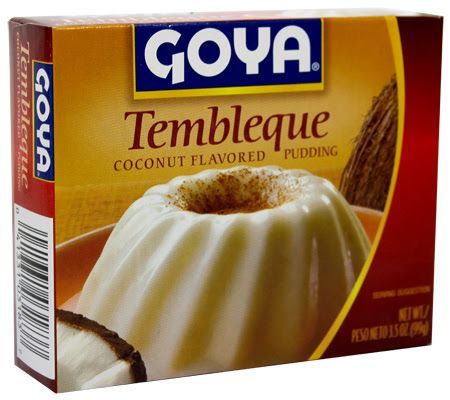
But please check the ingredients on your canned coconut because some have all sorts of additives and thickeners.
I prefer Goya brand. “Si es Goya tiene que ser bueno!” [not sponsored 😀]
Tembleque is delicious all year long, but it is a must-make dessert for the holidays!
Some of our other favorite Puerto Rican desserts include Pumpkin Flan, Mantecaditos, and Quesitos.
How to Make Tembleque:
- Coconut milk – You will need 2 cans of coconut milk. You could also use 3 can and it will have a looser, pudding texture.
- Cornstarch – This is the ingredient that will thicken the tembleque. This is a pretty firm tembleque. If you would like it creamier use half the amount.
- Sugar – I recommend 2/3 cup, but you can always use more or less to adjust the sweetness to your liking.
- Salt – Not enough to make it salty, just to enhance all the other flavors.
- Cinnamon – There’s no cinnamon actually in the tembleque, but it’s dusted over top before serving.
Bonus: tembleque is naturally gluten-free (double check ingredients) and dairy-free (vegan).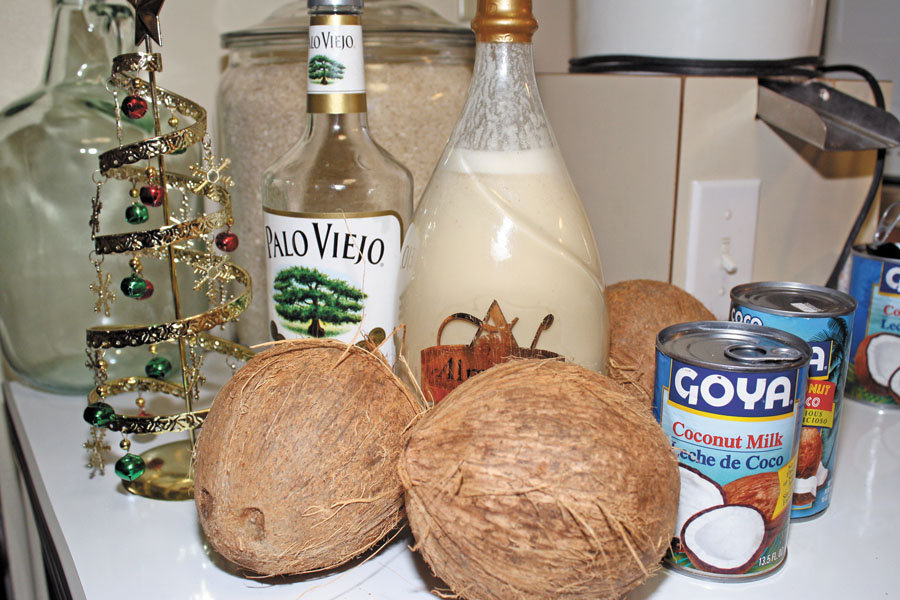
Some people like to add a little extra sabor. This can include 1 of the following:
- Orange blossom water (1 tablespoon)
- Rose water (1 tablespoon)
- Vanilla extract (1 teaspoon)
- Lime zest (1/2 teaspoon)
- Pinch of nutmeg
Tembleque Steps
- Dissolve the cornstarch in cold or room temperature coconut milk. If you add it to warm liquid it will be a lumpy mess. No bueno.
- Bring the dissolved cornstarch, coconut milk, sugar and salt to a boil, then lower the heat and cook until the tembleque has thickened.
- Pour into molds and refrigerate until thoroughly chilled.
- After chilling, run a knife around the mold to loosen, then invert onto a plate. Dust liberally with cinnamon and enjoy!
Note about molds:
Tembleque can be prepared in fancy molds or simple pans.
It can be prepared in personal pans or a large dish that’s cut into individual servings.
My grandmother has beautiful vintage copper molds like this one: Copper Heart Mold.
You could also use a square pan (cut into squares for serving) or a pie pan (cut into wedges).
Disposable aluminum pans are also handy if taking to an event. Don’t unmold or it may have a strange pattern on the top! 😂
You can find the beautiful flower silicone molds I used on Amazon!
Ingredients
- 2 cans (13.5 oz each) coconut milk
- 1/2 cup cornstarch
- 2/3 or 3/4 cup sugar
- 1/2 teaspoon salt
- Ground cinnamon, for dusting
- Cinnamon sticks, coconut shreds, for garnish
Instructions
- Set out molds for tembleque (square pan, individual ramekins,
etc. See post for more details about molds). - Whisk the cornstarch with 1 can of coconut milk until completely dissolved and smooth.
- Pour into saucepan along with remaining can of coconut milk, sugar and salt. Bring to a boil over medium heat, stirring constantly with a wooden spoon, about 5 minutes.

- Reduce heat to medium-low and continue cooking until thick, about 1-3 minutes.
- Pour mixture into mold(s) and let cool to room temperature before covering with plastic wrap.
- Refrigerate until thoroughly chilled, preferably overnight, but may take only a few hours depending on the size of molds.
- Run a knife around the edge of the pan to loosen, then invert onto a plate. Sprinkle with cinnamon before serving and garnish with cinnamon sticks and shredded coconut (optional).

Recommended Products
As an Amazon Associate and member of other affiliate programs, I earn from qualifying purchases.
Flower Molds
Goya Coconut Milk
Nutrition Information:
Yield: 8
Serving Size: 1
Amount Per Serving:
Calories: 160Total Fat: 4gSaturated Fat: 4gTrans Fat: 0gUnsaturated Fat: 1gCholesterol: 5mgSodium: 195mgCarbohydrates: 29gFiber: 1gSugar: 16gProtein: 3g
Nutritional information provided is an estimate only. Please consult the labels of ingredients you use for more accurate results.
Tembleque (Coconut Pudding from Puerto Rico)
Tembleque is going to change the way you look at jello molds. This popular holiday dessert is pure coconut, laced with warm spices and a hit of citrus. It’s a staple in Puerto Rico and many other Latin American countries, especially around Christmas, but I’m not a fan of sticking to the calendar rules, so I make it year-round. Once you see how easy it is to prepare, I know you will, too.
What is Tembleque?
Tembleque is a coconut pudding from the island of Puerto Rico. Though many other Caribbean islands serve coconut puddings, Puerto Rico is where tembleque originated.
Tembleque is pronounced: tehm-bleh-keh. Tembleque means to wobble or quiver, which is so spot on because this cornstarch-based pudding does a lot of that. It is a very popular holiday dessert amongst Puerto Ricans, but it is suitable for enjoyment all year.
What does Tembleque taste like?
Tembleque tastes most like coconut, but it can have other flavors based on the recipe. Cinnamon is the most popular spice added to this coconut pudding. Orange blossom water or orange peel is another. Expect to taste a prominent coconut flavor flecked with warm spices for the most part. Oh! And it’s sweet, but not cloyingly so. I feel like most countries worldwide are more subdued when it comes to adding sugar to their desserts. I find the amount of sweetness in tembleque is just right.
What do I need to make Tembleque?
To make tembleque, you need coconut milk (I only use fresh coconut milk), the peel of a navel orange, cinnamon sticks, star anise, cloves, fresh ginger, nutmeg, salt, sugar, cornstarch (known as cornflour in other parts of the world), and vanilla extract. The spices I use are optional, except for the cinnamon. I find that my combo of spices adds more interest to the dessert than when I use just cinnamon, so I recommend trying the recipe as written at least once.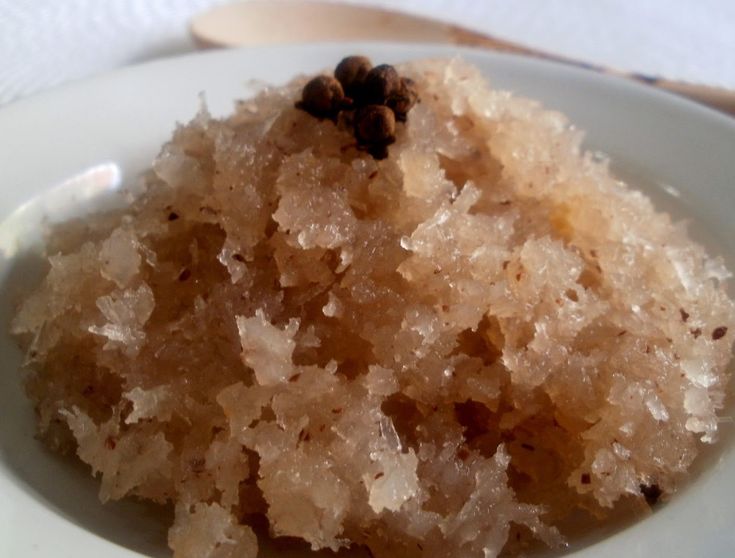
This is a simple dessert to make as it all comes together in one pot before it’s poured into a mold and chilled. You’ll need a whisk, too.
Is Tembleque the same as flan?
Tembleque is similar to flan in that they are both molded desserts that are served cold. That’s really where their similarities end, though.
Tembleque is made with coconut milk that’s thickened with cornstarch. On the other hand, flan is made with cow’s milk and thickened with eggs. One is naturally vegan and dairy-free. The other isn’t. You can make flan with coconut milk, but it needs to contain eggs for it to become the custard it is. Tembleque doesn’t.
Is orange always used in Tembleque?
The old-school recipes for tembleque add orange blossom water to the pudding base. I don’t usually keep orange blossom water in the pantry, but I always have oranges in the house. I add that subtle hint of orange by infusing the coconut milk with a couple of orange peels and spices. You can totally omit the orange peel or substitute lime peel or lemon peel for it instead.
Add the peel to a portion of the coconut milk in a 3 or 4-quart saucier. I always use a saucier because it has sloped sides. Whenever you’re making a pudding like this one, you want to avoid any corners where the thickening pudding can settle into. It’ll make for a smoother, tastier pudding if you’re not scorching some parts of it that are lodged in a corner somewhere.
Can I use canned coconut milk to make coconut pudding?
I’m very old-school in my approach to authentic Puerto Rican recipes like this tembleque. I try to stay as close to what my ancestors would’ve done back in the day. This is one of the reasons I make most of my coconut desserts with fresh coconut milk. The other reason is that canned coconut milk tastes like canned coconut milk. It, to me at least, tastes very processed. If you don’t find that to be the case, by all means, replace the fresh coconut milk in this recipe with canned. You’re going to use the same amount. The pudding will taste more coconutty (since the milk is concentrated) but may also have a metallic or tinny taste and a grey undertone. Fresh coconut milk is more mellow and will result in a more consistent taste and milky white color.
To the coconut milk and orange peel in the pot, add the cinnamon stick, star anise, whole cloves, a few scrapes of nutmeg, and salt. Bring this mixture up to a simmer over medium-high heat. The fat solids in the coconut will begin to separate a bit, which will make the liquid look curdled. That’s totally normal. Allow the coconut milk to simmer for a full 2 minutes. If it starts to boil, reduce the heat.
How long do the spices have to steep in the coconut milk?
Stir the coconut milk once or twice during that 2-minute simmer, then turn the stove off. Allow the spices to steep in the hot coconut milk for 5 minutes. This is how to get that warm flavor of the spices locked into that milk.
Can I use ground spices instead of whole?
Yes, you can use ground spices to flavor your tembleque, but I avoid it for the sake of appearances. Adding a bunch of ground spices to the pudding will cause it to take on this funky-looking beige color. Tembleque should be as close to white as possible. But, if you don’t have or want to buy whole spices, I’ve included the measurements for replacing them with ground spices in the recipe card.
Once the spices have steeped in the coconut milk, use a French whisk to stir in the sugar. The sweetness of this tembleque is perfect for me. Thanks to my time living in Europe, I don’t like hyper-sweet desserts. This is a nice balance of creamy coconut and sugar. If you have a crazy sweet tooth, you can add an additional 1/4 cup of sugar here. Whisk the sugar into the hot coconut milk for about 1 minute.
What thickens Tembleque?
Tembleque is a pudding, which means it is thickened with something other than eggs. It becomes custard when you thicken a sauce or dessert with eggs. Again, flan is one of the most popular custards in Latin America, so it’s one you are probably familiar with.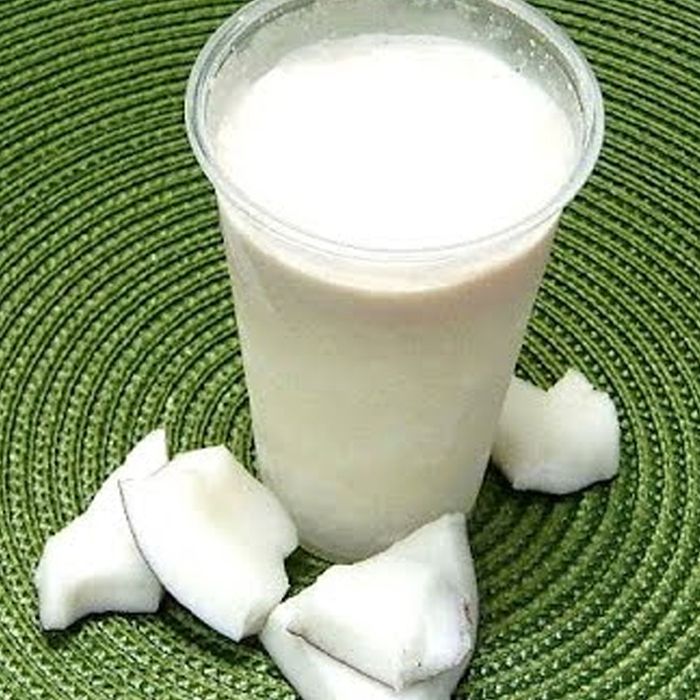 Cornstarch (also known as cornflour) is what thickens tembleque. Cornstarch is naturally gluten-free, so it’s safe for those avoiding it. As always, be sure to check the label to see that’s yours is produced in a gluten-free environment.
To use cornstarch, you first need to make a slurry. Add the remaining cup of coconut milk to the cornstarch in a bowl in a steady trickle. Whisk the mixture constantly as you pour the coconut milk into the cornstarch to avoid clumps from forming. Once all of the coconut milk is in the bowl, you can stir it a few more times to ensure it’s smooth. That’s your slurry!
You can thicken tembleque with arrowroot or tapioca, with caveats. If you substitute arrowroot, you can use the same measurement as you would cornstarch. The biggest downside to using arrowroot is that it doesn’t hold for extended periods. So, if you plan to make this ahead, be prepared for a significant change in texture as it sits. I’d use arrowroot powder only as a last resort. Tapioca flour (cassava or yuca flour) is a better option. You need to double the amount to 1 cup of tapioca flour to use in this recipe. However, tapioca flour holds considerably well and also freezes well.
How do I know if my Tembleque is thick enough?
The crazy thing about a cornstarch slurry is that it won’t thicken anything unless it’s added to a liquid and boiled. But before you go doing all of that, use a slotted spoon or a small strainer to remove the whole spices from the coconut milk in the pot. I use a spoon with holes, but the cloves may be hard to capture with it. Just do your best to extract them all.
Turn the stove back on, this time to medium heat.
Add the cornstarch slurry to the coconut milk in a slow, steady trickle, stirring constantly. If you dump the slurry into the still-hot coconut milk, it’ll likely clump to all hell. No one on the planet wants to bite into a cornstarch gummy bear. Do this slowly.
Once all the slurry has been stirred in, allow the tembleque to come up to steaming. Continue stirring constantly, paying close attention to the sides, which heat up faster. Incorporate the slurry from the outside of the pan into the center. This ensures a smooth pudding.
After about 1 1/2-2 minutes, the tembleque will thicken to the point where it resembles mayonnaise. The pudding should not be super stiff because it won’t wobble properly once cool. You don’t want it too thin either, because it won’t set up properly. Mayonnaise-like is the right consistency here. If it’s still too thin, allow it to simmer for 30 seconds to a minute longer. If it’s not at all thick, make more slurry with 1 tablespoon of cornstarch stirred into 1 tablespoon of cold water. Add it the same way as before and see if that thickens it up.
Remove the pot from the stove and stir in the vanilla extract. Continue stirring for 30 seconds to cool the pudding slightly.
What kind of mold do I use for Tembleque?
Part of the fun of making tembleque comes in watching it wobble, but seeing its decorative appearance is also pretty awesome. I always make my tembleque in this crown bundt pan from Nordic Ware because it comes out so beautifully. You can use a flexible silicone mold, but I have seen people break their tembleque when they try to remove it from the mold. You also don’t want a mold that’s too intricate. The tembleque will stick in pans with too many details.
Before pouring your hot pudding into the mold, though, add 1 1/2 tablespoons of water to the empty mold. Move the water around in the mold to moisten it. Be sure to get the center tube if your pan has one. Once you’ve wet the inside of the mold, leave the excess water to pool at the bottom of the mold.
Pour the hot tembleque into the mold. Move the pot around the mold as you pour to make sure it fills evenly. The water will rise up around the pudding to create a barrier that will make de-panning easier.
How do I make individual Tembleque?
If you want to make individual tembleques, divide the pudding equally between 3-4 ounce molds. This recipe will make about 8 individual tembleques.
When making individual tembleques, it’s best to set the molds on a sheet pan before filling them. Pour the hot pudding into the moistened mold and transfer the sheet pan with the molds into the fridge. They take only 1 hour to set up when made in individual molds, but I recommend chilling them for at least 3 hours.
How long does it take to set up?
Tembleque only takes 2 hours to set up enough to unmold, but I like to chill it for at least 4 hours. This is where metal pans come in handy. They are great conductors, so the tembleque chills faster and more evenly.
Set the uncovered pan into the fridge and allow it to chill and set up completely. This will take anywhere from 2-4 hours. After 2 hours, or when it’s no longer emitting heat, you can cover it with plastic wrap. This I recommend, especially if you plan to store it overnight.
My Tembleque isn’t coming out of the mold! What do I do?
Once your tembleque is chilled, flip the pan over onto a serving plate. Leave the tembleque inverted until you hear a “schloop!” come from the pan. That’s how you know your tembleque is unmolded.
If you don’t hear a schloop within 3 minutes, flip the pan right-side up and grab a small paring knife or a toothpick. Go around the outside of the pudding with the tip of your knife to loosen it, don’t forget to loosen the pudding around the inner tube if there is one. Invert the pan once again and wait for the schloop.
If the schloop never happens, it means that you didn’t moisten the pan well enough. That’s a bummer, but you can always scoop the tembleque from the pan with a spoon and serve it that way.
How do I serve coconut pudding?
Tembleque is always dusted in ground cinnamon before serving. You can go a step farther and garnish it with slivers of coconut or with toasted coconut flakes. You can also drizzle chocolate sauce, cajeta, caramel, or smooth guava paste over it for an even more unique flavor.
My family eats tembleque along with a cup of café con leche (coffee with milk). The kids usually drink milk with theirs. Tembleque is served cold, so store it in the fridge lightly covered until you’re ready to indulge.
Can I freeze Tembleque?
You can freeze the tembleque for up to 1 month.
- After unmolding and garnishing it with cinnamon, wrap it well in plastic film. I prefer to unmold it into a freezer-safe container that has a lid, then wrap the container in plastic.
- Freeze the tembleque for up to 1 month.
- Thaw the frozen pudding in the fridge overnight. Some liquid may seep out after thawing. Just use a paper towel to blot it up.
- Garnish and serve as desired.
How can I switch up the flavors?
There’s plenty of ways to switch up the flavor of this tembleque:
- Use cinnamon sticks only (omit the other spices and orange peel).
- Replace the orange peel with lime or lemon peel.
- Use almond, coffee, orange, or rum extract instead of vanilla.
I tend to stick with what I know, but you can always alter this recipe to make your unique tembleque.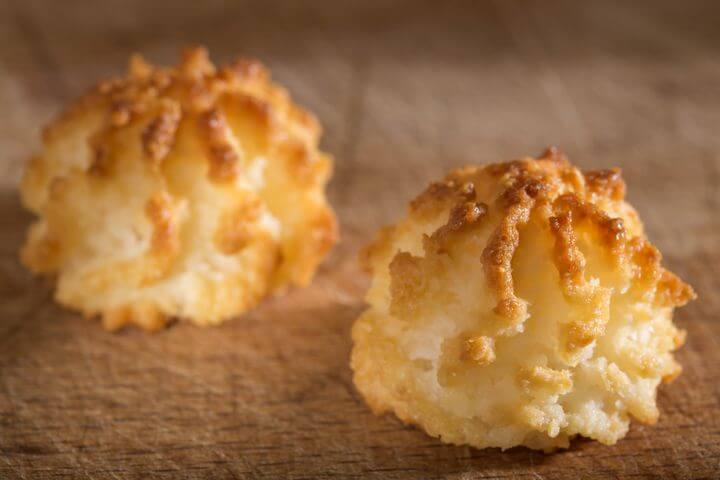
What are other popular Puerto Rican desserts served during the holidays?
If you’re looking for more typical Puerto Rican holiday desserts, here are the most common recipes:
- Arroz con Dulce (coconut rice pudding with raisins)
- Flan (Puerto Rican-style egg custard)
- Mantecaditos (almond thumbprint cookies)
Once again, tembleque is a Puerto Rican holiday staple when it comes to desserts. Since it’s such an easy dessert to make, I hope you’ll add it to your dessert table this year. It’s an easy dessert to start your holiday celebrations with. Let me know what you think of it when you try it, and don’t forget to tag me on Instagram or Facebook if you make it.
Tembleque is a Puerto Rican coconut pudding that’s flavored with cinnamon, orange, and warm spices.
Servings: 8
Print Pin Recipe
Prep Time 10 mins
Cook Time 4 mins
chilling time 2 hrs
Total Time 2 hrs 14 mins
3 or 4-quart saucier
whisk
10 to 12-cup bundt pan or mold
- 4 cups (950 milliliters) fresh coconut milk (or canned), separated
- 2 3-inch orange peels (from 1 medium navel orange)
- 1 large cinnamon stick (or 2 3-inch long cinnamon sticks)
- 2 1/4-inch thick ginger slices
- 1 star anise
- 1/2 teaspoon whole cloves
- 1/8 teaspoon ground nutmeg
- 1/8 teaspoon kosher salt optional
- 1 cup (200 grams) granulated sugar
- 1/2 cup (61 grams) cornstarch
- 1 tablespoon (15 milliliters) vanilla extract
Optional Garnishes
- ground cinnamon
- coconut flakes or slivers
Moisten the Mold
Infuse the Coconut Milk
Pour 3 cups of the coconut milk into a 3 or 4-quart saucier.
To the coconut milk in the pot, add the orange peel, the cinnamon stick, ginger slices, star anise, whole cloves, nutmeg, and salt.
Bring this mixture up to a simmer over medium-high heat. The fat solids in the coconut will begin to separate a bit, which will make the liquid look curdled. That’s totally normal.
Allow the coconut milk to simmer for a full 2 minutes. If it starts to boil, reduce the heat to medium-low.
Stir the coconut milk once or twice during that 2-minute simmer, then turn the stove off.
Use a whisk to stir in the sugar into the coconut mixture, then allow the spices to steep in the hot coconut milk for 5 minutes.
Make the Slurry
Thicken the Coconut Mixture
Use a slotted spoon or a small strainer to remove the whole spices from the coconut milk in the pot.
Turn the stove on to medium heat.
Add the cornstarch slurry to the coconut milk in a slow, steady trickle, stirring constantly.
Once all the slurry has been stirred in, allow the tembleque to come up to steaming. Continue stirring constantly, paying close attention to the sides, which heat up faster. Incorporate the slurry from the outside of the pan into the center.
After about 1 1/2-2 minutes, the tembleque will thicken to the point where it resembles mayonnaise.
Remove the pot from the stove, and stir in the vanilla extract. Continue stirring for 30 seconds to cool the pudding slightly.
Pan the Tembleque and Chill
Pour the hot tembleque into the moistened mold, going around the mold as you pour it in to make sure it’s added evenly.
The water will rise up around the pudding to create a barrier that will make de-panning easier.
Set the uncovered pan into the fridge and allow it to chill and set up completely, or anywhere from 2-4 hours.
After 2 hours, or when it’s no longer emitting heat, you can cover it with plastic wrap.
Once your tembleque is chilled and is firm to the touch, flip the pan over onto a serving plate.
Leave the tembleque inverted until you hear a “schloop!” come from the pan. That’s how you know your tembleque is unmolded.
Garnish the tembleque with a sprinkle of ground cinnamon and slivers of coconut.
Serve chilled.

Swaps and Substitutions:
- Use canned coconut milk instead of fresh coconut milk.
- Use cinnamon sticks only (omit the other spices and orange peel).
- Replace the orange peel with lime or lemon peel.
- You can increase the sugar to 1 1/4 cup if you like a very sweet tembleque.
- You can thicken tembleque replacing the cornstarch with arrowroot powder using the same measurement called for. The biggest downside to using arrowroot is that it doesn’t hold for extended periods.
- Tapioca flour (cassava or yuca flour) is a better option for a replacement thickener. Double the amount to 1 cup of tapioca flour to use in this recipe. Tapioca flour holds considerably well and also freezes well.
- Use almond, coffee, orange, or rum extract instead of vanilla extract.
To Use Ground Spices replace the whole spices with:
- 1/2 teaspoon ground cinnamon
- 1/4 teaspoon ground ginger
- 1/8 teaspoon ground cloves
- pinch of star anise powder
- pinch of ground nutmeg
Tips and Techniques:
- If the tembleque is too thin after you add the slurry, allow it to simmer for 30 seconds to a minute longer. If it’s not at all thick, make more slurry with 1 tablespoon of cornstarch stirred into 1 tablespoon of cold water. Add it the same way as before and see if that thickens it up.
- Metal pans are ideal for making tembleque because they are great conductors, so the pudding chills faster and more evenly.
- A flexible silicone mold can be used, but it may cause you to break the tembleque when you remove it from the mold.
- Don’t use a mold that’s super intricate in it’s design. The tembleque is more likely to get stuck in a pan with a lot of details.
- Tembleque only takes 2 hours to set up enough to unmold, but chilling it for at least 4 hours is recommended.
- If you don’t hear a schloop within 3 minutes, flip the pan right-side up and go around the outside of the pudding and where the tube is with the tip of a paring knife or toothpick to loosen it. Invert the pan once again and wait for the schloop.
- If the schloop never happens, it means that you didn’t moisten the pan well enough. So you will have to scoop the tembleque from the pan with a spoon to serve it.
- Tembleque is always dusted in ground cinnamon before serving. You can also garnish it with slivers of coconut or with toasted coconut flakes or a drizzle of chocolate sauce, cajeta, caramel, or smooth guava paste.
 If it’s not at all thick, make more slurry with 1 tablespoon of cornstarch stirred into 1 tablespoon of cold water. Add it the same way as before and see if that thickens it up.
 So you will have to scoop the tembleque from the pan with a spoon to serve it.
 To Make Mini Tembleques (makes 6-8 depending on mold size):
- Set 3 or 4-ounce molds on a sheet pan.
- Pour the hot pudding into the moistened mold and transfer the sheet pan with the molds into the fridge.
- Chill the tembleque for at least 3 hours before unmolding.
Storage Instructions:
Tembleque is served cold, so store it in the fridge lightly covered or in a container until you’re ready to indulge.
Freezer Instructions:
- After unmolding and before garnishing it with cinnamon, flip it out of the pan and into a freezer-safe container that has a lid, then wrap the container in plastic.
